Automating Postmypost publishing with n8n
What is n8n?
n8n is a workflow automation platform that lets you connect different services and apps without writing code. You can configure workflows where one action triggers another — for example, fetching data, processing it, and sending it to another service.
n8n is often used as a "bridge" between systems: CRMs, messengers, analytics, content‑publishing services, and various APIs.
How does n8n work?
Work in n8n is based on nodes. Each node performs a single action: get data, send a request, filter information, or evaluate a condition. Nodes are connected into a logical chain, forming an automation workflow.
A workflow can be started manually, on a schedule, or by an event — for example, on a new message, record creation, or an incoming webhook. After start, n8n executes all steps in sequence and passes data from one node to the next.
What is n8n used for?
n8n is used to automate routine processes and integrate services that don’t have a direct connection. This helps reduce manual work, lower error rates, and speed up task execution.
Teams use it for automatic content publishing, synchronizing data between systems, processing leads, notifications, collecting analytics, and working with APIs. Thanks to its flexibility, n8n fits both simple tasks and complex multi‑step processes.
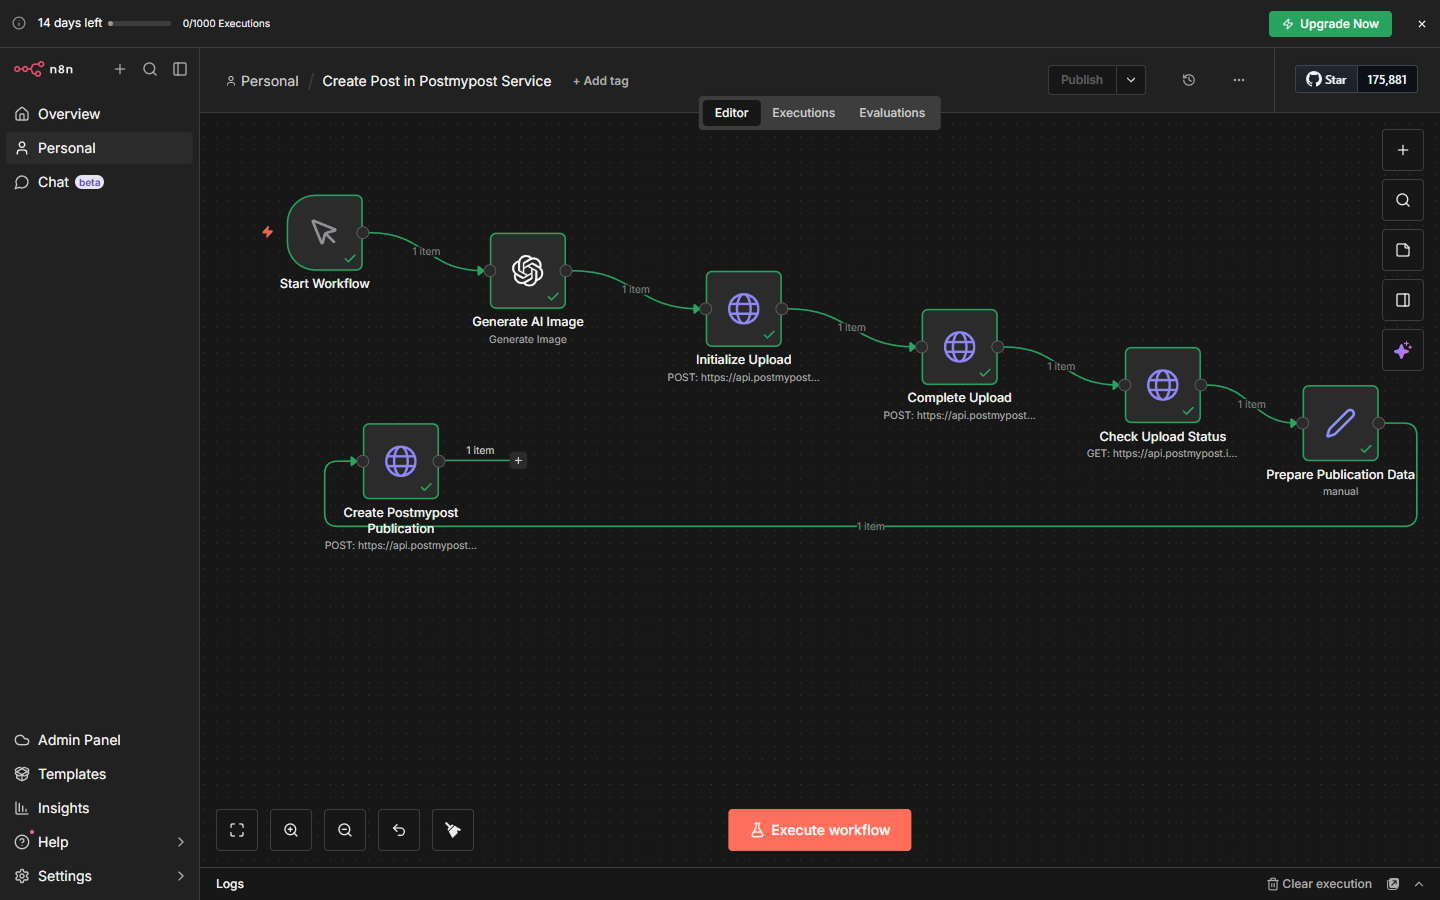
Example automation chain to create posts with AI image generation
In this example:
- An AI model generates an image from a given prompt.
- The generated image is automatically uploaded to Postmypost via API.
- After a successful upload, a post with this image is created and published.
This way, the whole process — from generating an image to publishing a ready post — happens automatically within one workflow.
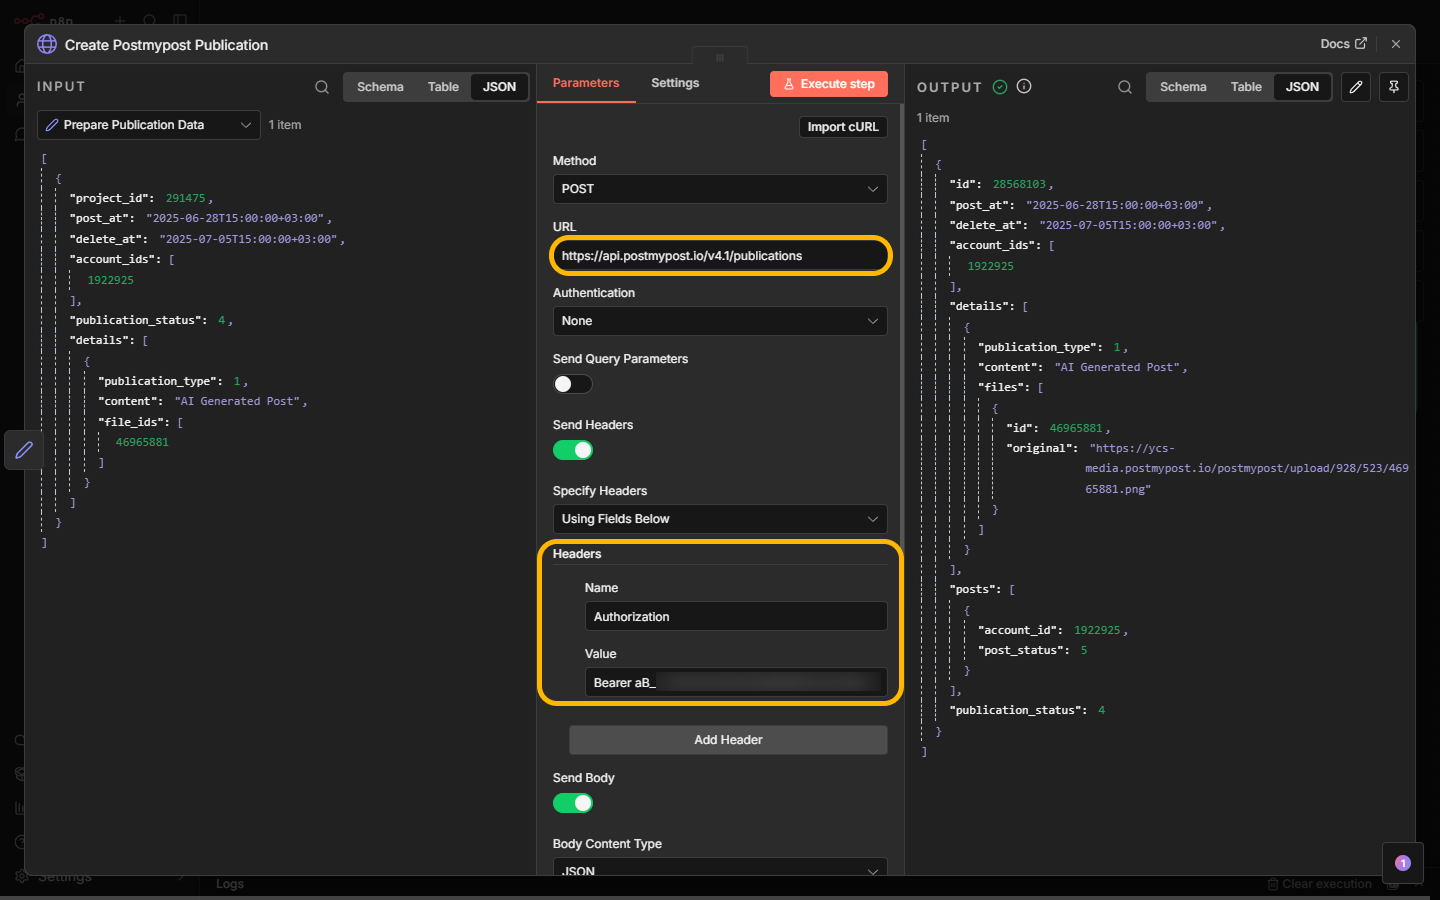
Important: include the HTTP Authorization header in all Postmypost API requests:
Authorization: Bearer <token>Where
<token>is your access token (see “How to get an API token in Postmypost?”).
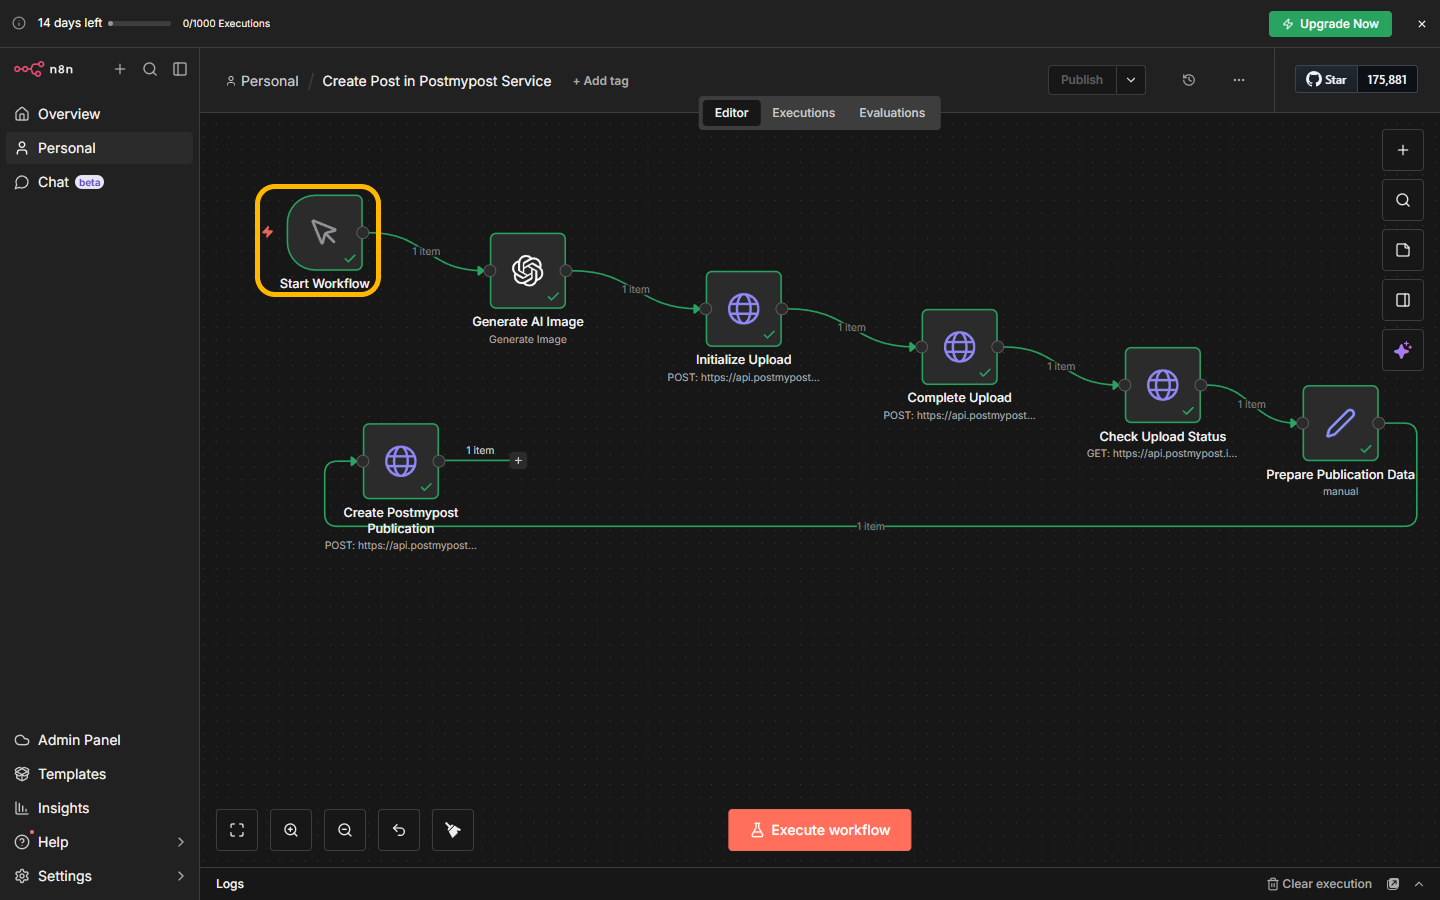
Step 1. Create workflow
- Go to n8n.
- Create a new workflow.
https://n8n.io/
Step 2. Start workflow
Manual trigger to start the chain.
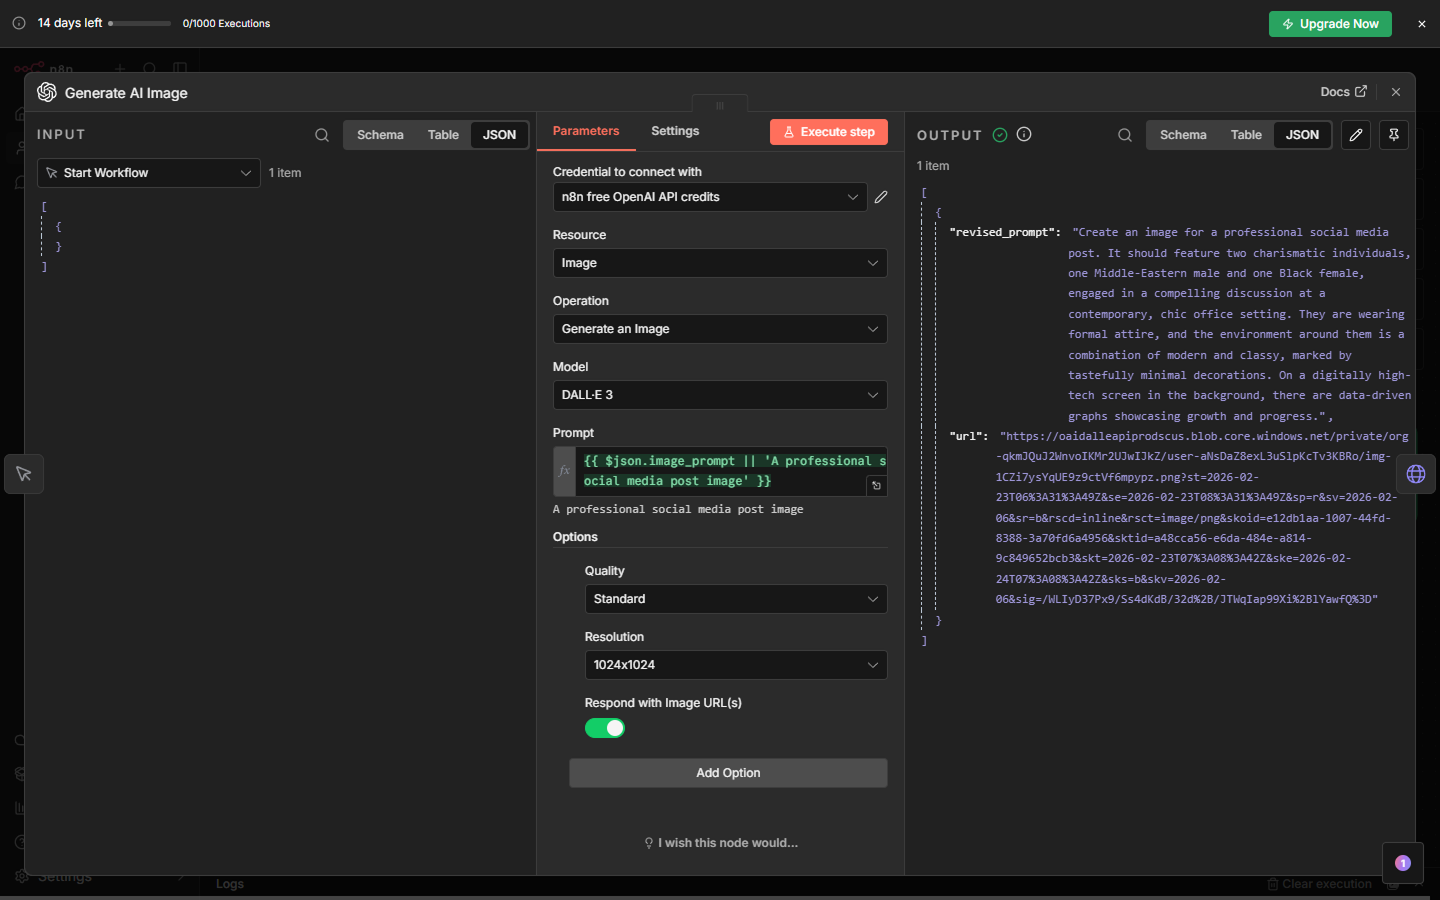
Step 3. Generate AI image
Generate an image using OpenAI DALL·E.
Output:
- Public URL of the generated image (e.g., https://oaidalleapiprodscus.blob.core.windows.net/...)
- Image metadata
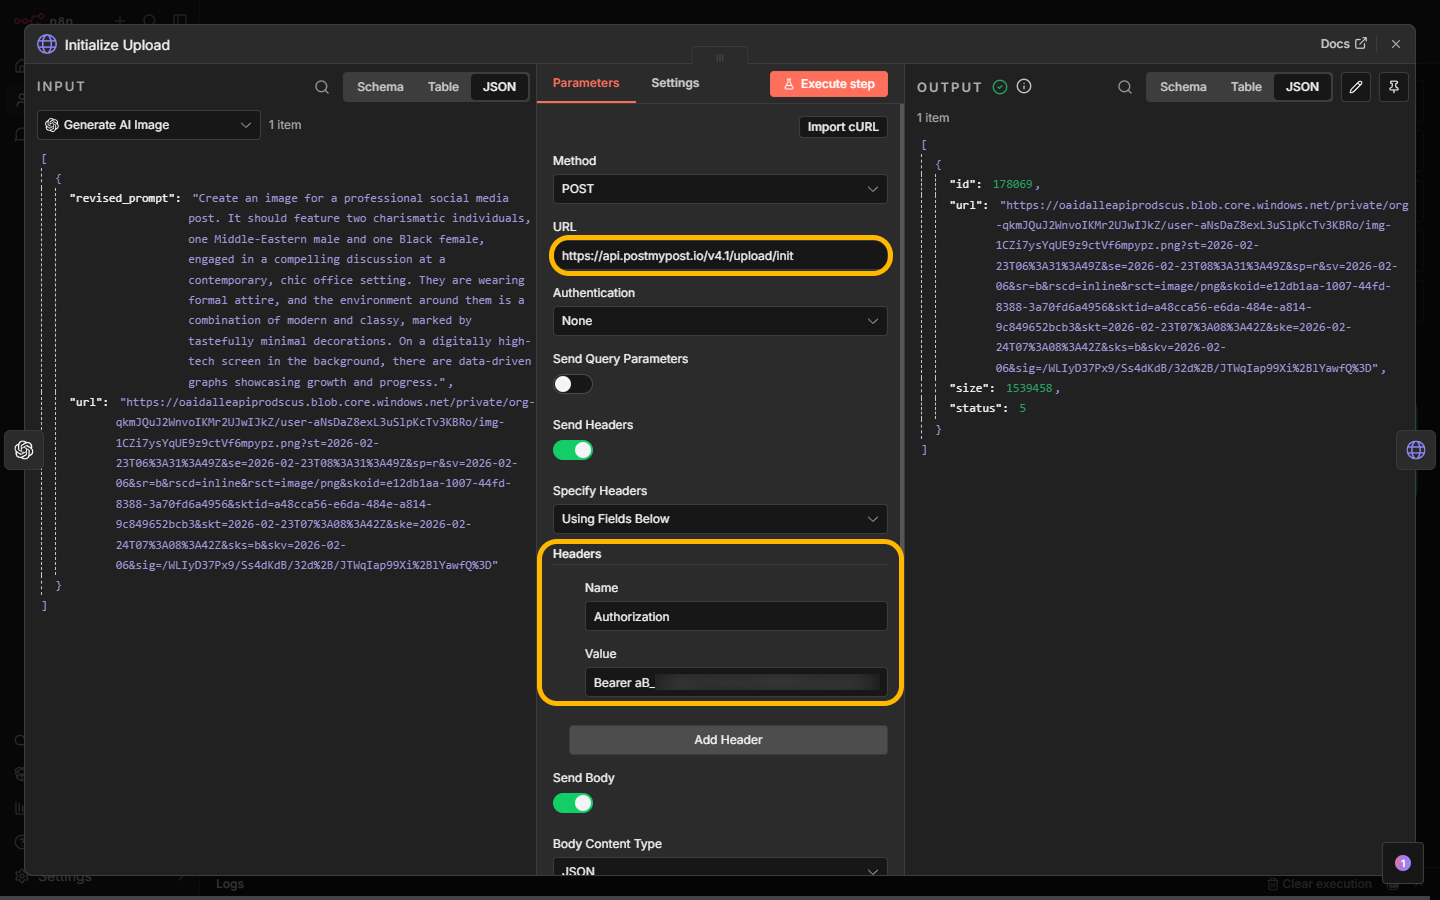
Step 4. Initialize upload
Initialize a file upload to Postmypost.
Note: pass the image URL from step 3 in the url field.
Request:
{
  "project_id": 245678,
  "url": "<URL from step 3>"
}
Response:
{
  "id": 1283466,
  "url": "https://storage.example.com/123/uploaded_img.jpg",
  "size": 259390,
  "status": 5
}
Explanation:
- id — upload ID (will be needed later)
- url — temporary S3 upload URL
- status = 5 — waiting for upload
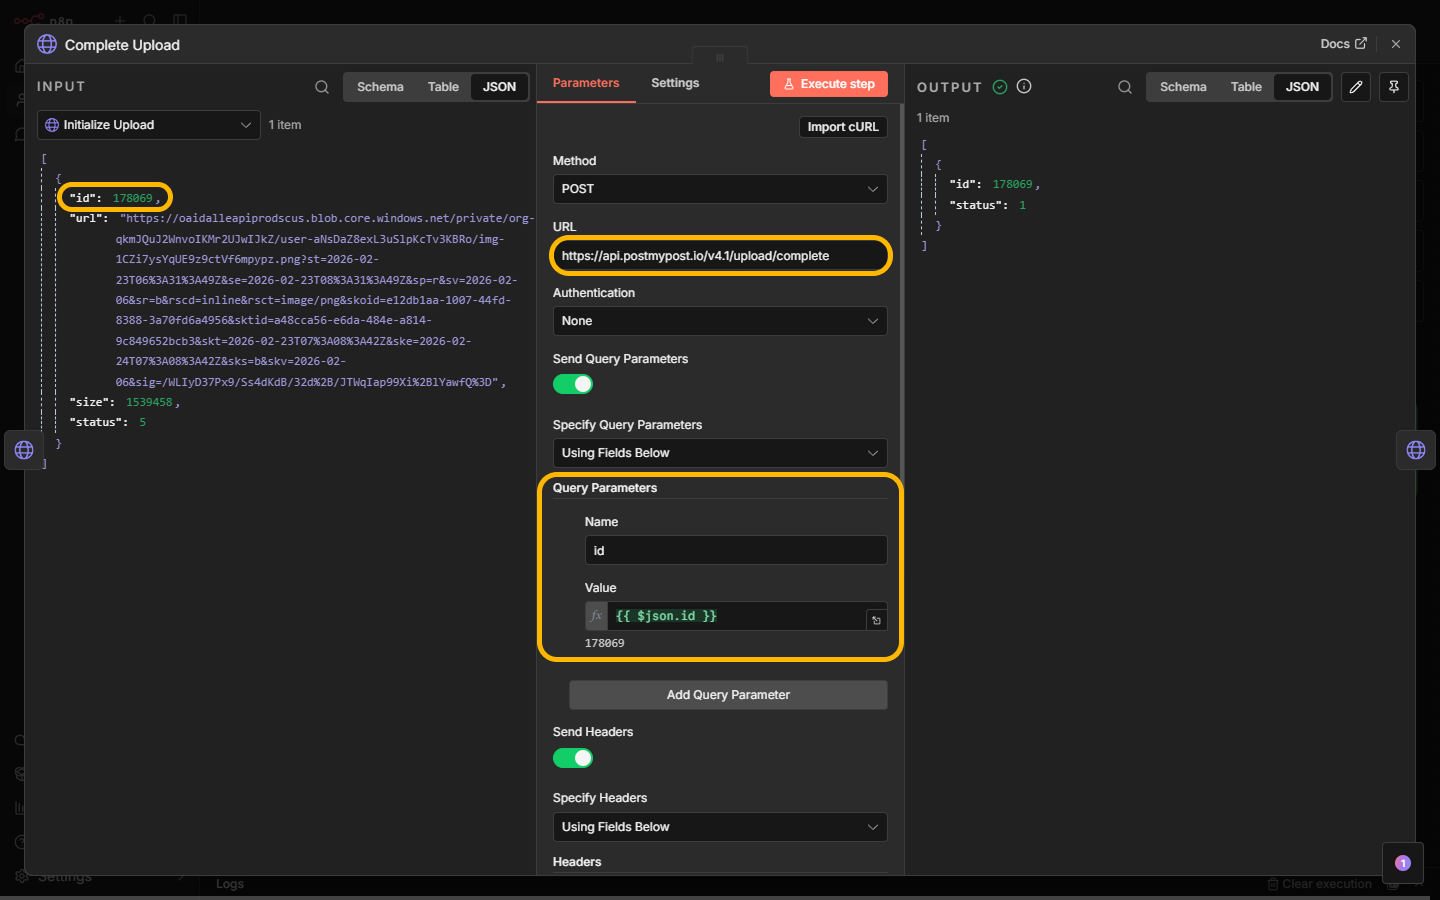
Step 5. Complete upload
Finish the upload in Postmypost.
Input:
- id from step 4
Response:
{
  "id": 112233,
  "status": 1
}
status = 1 — file uploaded successfully
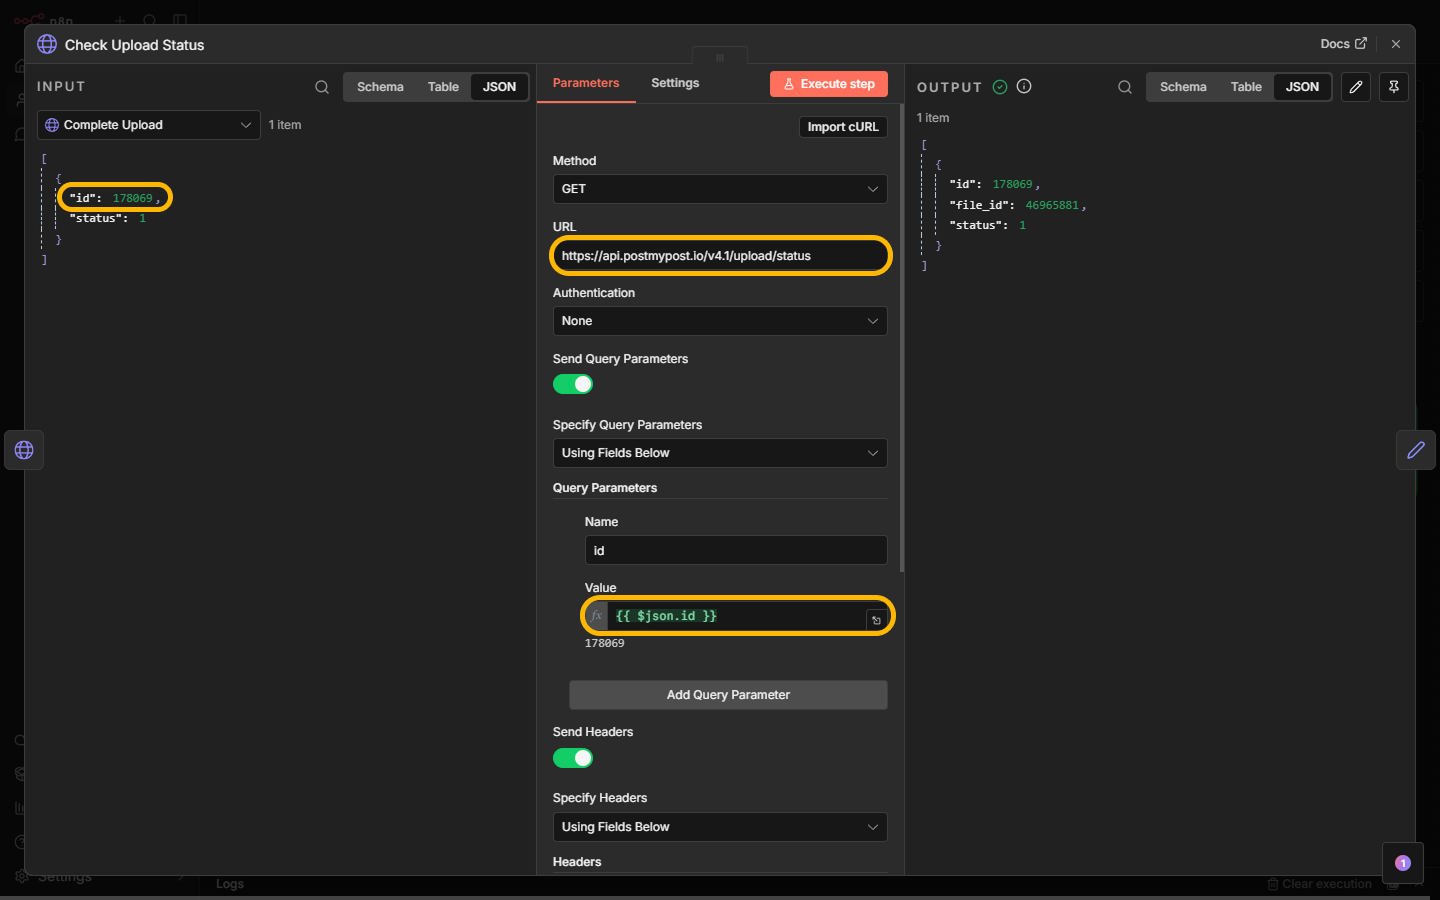
Step 6. Check upload status
Check the final upload status.
Response:
{
  "id": 112233,
  "file_id": 778899,
  "status": 1
}
Important:
- file_id — required to create a post
Statuses:
- 5 — waiting for upload
- 4 — uploading
- 3 — processing
- 2 — error
- 1 — uploaded successfully
Step 7. Create Postmypost publication
Create a publication in Postmypost with the attached file.
Note:
file_idsis an array of file identifiers. Pass the fileid(file_id) that was obtained earlier in the screenshots from step 4.
Request:
{
  "project_id": 245678,
  "post_at": "2025-06-28T15:00:00+03:00",
  "delete_at": "2025-07-05T15:00:00+03:00",
  "rubric_id": 17289,
  "account_ids": [4, 7, 10],
  "publication_status": 4,
  "details": [
    {
      "publication_type": "post",
      "content": "Your post text",
      "file_ids": [778899]
    }
  ]
}
Result:
- Confirmation of publication creation
- ID of the created publication with the media file